Customizing the App Server Settings and Setting Up Notifications
Navicat On-Prem Server is the perfect on-premise cloud solution for organizations who wish to maintain complete control over their data. By maintaining full control over your system, you can ensure 100% data privacy, while still benefiting from the convenience and features of a cloud-based solution. Navicat On-Prem Server also provides comprehensive management tools for MySQL and MariaDB, enabling efficient administration, monitoring, and management of your database instances.
Last week's blog article covered the first steps for configuring Navicat On-Prem Server on Windows 10 with a MySQL 8 Community Server instance. Today we will go over the App Server, Notification Settings, and Confirmation steps to complete the configuration process.
Customizing the App Server Settings
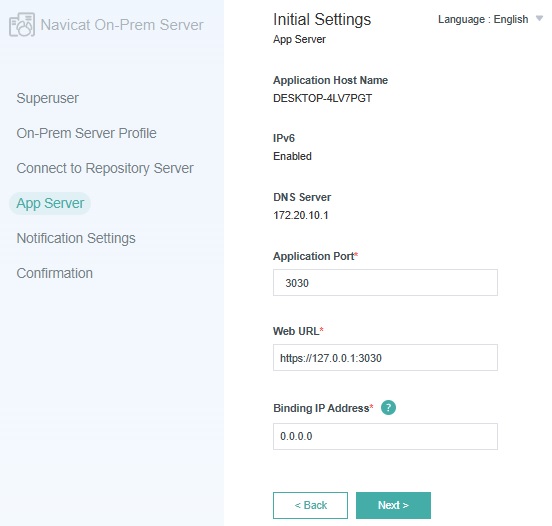
As mentioned in part 1, after you have installed Navicat On-Prem Server and start it for the first time, a browser will pop up and open the Welcome page of your Navicat On-Prem Server at http://
We can specify our own Application Port, Web URL, and Binding IP Address at this point. You may want to specify a Binding IP Address for users to access Navicat On-Prem Server if the machine has been assigned multiple IP addresses. An address of "0.0.0.0" means all IPv4 addresses on the machine, while "::" means all IPv4 and IPv6 addresses on the machine.
We'll stick with the defaults for the purposes of this tutorial.

Click Next > to continue.
Set Up Notifications
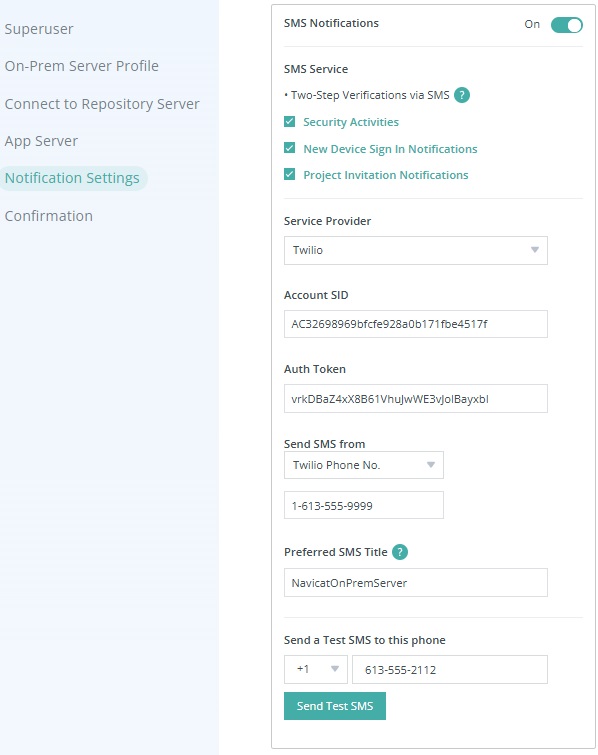
Whenever an event, such as two-step verification, security activities, new device sign-in, project invitation, or a system problem is raised while you are using it, Navicat On-Prem Server can send out notifications via SMS text message and/or email.
Supported SMS service providers include Clickatell, Twilio or Others.

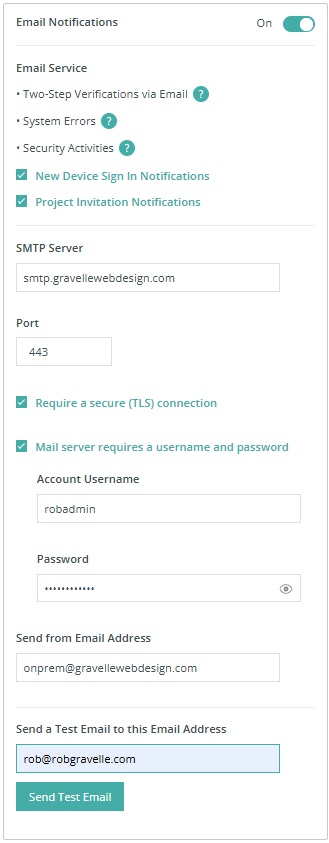
Email settings include the SMTP Server, Port, login details, Sending Address, and a few other options:

Click Next > to continue.
Confirmation
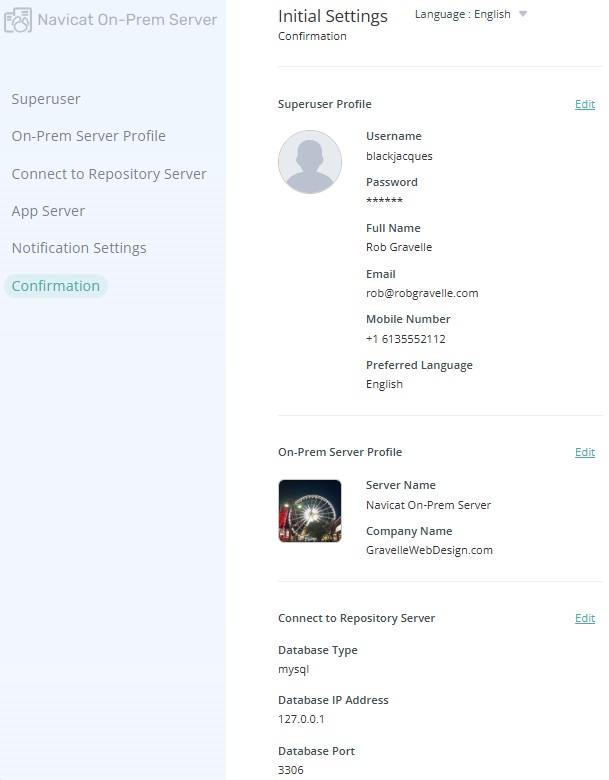
The confirmation screen gives you a chance to review all of your information before finalizing the configuration process.

Here, you can either click the Back button to change some details or Finish to proceed. Note that the initial configuration process may take a few minutes for setting up the repository database.
After the configuration has completed successfully, a login page will be displayed and you can log in Navicat On-Prem Server with the manager user account.
Conclusion
This two-part series walked us through the steps to configure Navicat On-Prem Server on Windows 10 with a MySQL 8 Community Server instance.
Interested in giving Navicat On-Prem Server a try? You can download it for a 14-day fully functional FREE trial. It's available for Windows, macOS (using Homebrew), and Linux operating systems.


